

【国外经典】Making Of starbucks coffee by Reinaldo Handaya
 9 小时前 上传
下载附件 (171.41 KB)
9 小时前 上传
下载附件 (171.41 KB)
一天一篇的赏析又来了,今天这篇教程的作者也是前两天翻译的那个Bergman Werntoft House教程的同一个作者,两篇教程都提到过他的老师说过的话,即:VRay只是一个工具,最重要的是要不断提高自己的审美能力和感觉。我也表示很赞同,这篇教程里作者讲的每一个细节都很详细,尤其是后期,几乎每一步都有讲,为什么要这么做,希望大家不要错过。
introduction (介绍)
The first time I’ve seen the photos of Starbucks Coffee by Kengo Kuma it really caught my eye. I loved the design very much. Simple materials but complicated. And after several observations I decided to recreate it in 3d.
当我第一次看到由Kengo Kuma设计的星巴克咖啡店的照片时,它确实令我入神了。 我非常喜欢这个设计。简约而不简单。并且随后的几番观察我决定用3D将它制作出来。
Here are a few photos of the original taken by Masao Nishikawa, and you can see them all at - Starbucks Coffee / Kengo Kuma & Associates on Archdaily.
这是一些Masao Nishikawa拍摄的原始照片,你可以在Archdaily网站上看到全部(Starbucks Coffee / Kengo Kuma & Associates )


I’m using 3dsmax 2012, VRay, Photoshop CS 5.5 and Magic Bullet to help me in post production. For some of the modeling, I got help from my friend, Sinung Wahyono… He is indeed a great 3d modeller.
我使用了3ds max 2012的版本,VRay, Photoshop CS 5.5和Magic Bullet来帮助我完成后期处理。有一些模型的建模,我从朋友那得到了帮助,Sinung Wahyono…他确实是一个很好的3D模型师。
Units(单位)
For interior rendering I always use centimeter units. Scale in this 3D rendering does matter. To get a good image we also need good proportion of our objects in the scene.
室内表现中我一般都使用厘米做为单位,比例在3D渲染中也非常重要。要得到一张好图,场景中物体比例要合理。

Gamma Space(伽马模式)
Before you start you must decided in what space we want to work… Gamma 1.0 or Gamma 2.2 space…
开始你的工作之前你必须要决定你的空间是要作用伽马1.0还是伽马2.0的模式
I often work in Gamma 1.0 space actually, but this time I decided to work in gamma 2.2 using Linear Work Flow.
在平时工作中我实际上都是使用伽马1.0,但是这一次我决定使用伽马2.2的线性工作流程。
Working in Linear Work Flow (LWF) is very easy because in real life camera also work in Gamma 2.2. There are lots of advantages in using LWF gamma 2.2. You will get your scene brighter than with Gamma 1.0 and the black part will not contrast so much too. This will help us to control the dark side of our rendering.
使用线性工作流程是非常容易的,因为现实生活的相机工作的伽马值也是2.2.使用线性工作流程伽马2.2有许多优势。你将得到比用伽马1.0的时候更明亮的场景,暗部对比也不会太强,这样就可以帮助我们去控制渲染图像的暗部。
You can learn more about LWF here – Linear Workflow Made Simple by Matt Gorner
你可以学到更多关于LWF从这里(注:我将链接换成了Fusion哥博客里的介绍,老外的全是E文,由于时间问题,这里就不翻译了)
附:LWF相关知识: 关于LWF——线性工作流
Here are the settings…
下面就是设置

Modeling(建模部分)
First thing to do was to create the building. I used splines to define the walls, ceiling, and floors and then used the extrude modifier to create them.
第一件事情就是创建建筑模型,我使用二维线来勾画墙体,天花板还有地面然后使用挤出修改器来创建他们。

After that I continued to the woodworking. Nothing special here actually… I modeled the single wood group the would be repeated along the walls with chamfered boxes, and then copy pasted them to arrange along the walls… old school, takes time, but simple.
之后,我继续建立木头,实际上这里没有什么特别…我建立一个单一的木头模型组,并将这些倒角BOX沿着墙体重复复制。这是比较笨的方法,但是也很简单。

I then added the interior furnishings such as the tables, chairs and bar area to fill up the interior following the reference photos of the real thing.
然后我加入一些室内装饰品,例如桌子,椅子和客厅里的东西参考真实场景进行摆放。

Lighting(灯光照明部分)
In the image below you can see my settings for the lighting…
从下图中你可以看到我的灯光参数设置


This time I used an HDR as the main light source in the scene, tweaked a bit using color correct.
在场景里我使用一个HDR作为主要的光源,并且调节了一下它的颜色。
I used HDRI for the first time in this scene and found out that it needs more render time since you need a high enough subdiv setting. On the other hand you can get away with lower hsph subdiv value.
我第一次在这个场景中使用HDRI时发现它的使用速度很慢因为需要你设置一个比较高的细分值。而用另外一种方法,你可以设置一个低的细分值。
I also used a VRay Light Plane for the indirect light from the floor. As you can see in the option, I didn’t check the invisible option. This will be useful for the render element and I will explain it later.
我另外使用VRay片灯作为地面的间接光照。正如你所看到的选项,我没有检查你看不到的选项,这将是非常有用的,我一会儿在后面说明。
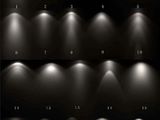
Also, for down-lights I use VRay ies because it count Light Cache very fast, not like ordinary IES photometric light.
另外,对于向下照射的灯,我使用VRay光域网,因为它计算灯光缓存特别快,不像普通的光度学光域网。
So as you can see I use a simple lighting technique here.
这就是你所看到的我使用了一个简单灯光照明技术。
Camera(摄像机)
Setting up your VRay Cameras is an important stage. You can see my settings in the image below
设置你的VRay(物理)相机是一个非常重要的步骤,你能看到我的设置从下图。

I tried to stay true to real photography aspect ratios and find the best viewpoints possible… Thinking about the woodwork on the walls catching the light and having the rule of thirds in mind to as I set the entrance on the lower left third. There is also a strong diagonal line going from top left to bottom right, catching the wall to ceiling line and the benches too.
我试图忠实于现实摄影效果和找到最好的可能性观点…思考木制品在墙上捕捉到的灯光按照三分法则应该将入口降低至左下1/3处,还有一个强烈的对角线是从左上角到右下角
For White Balance, I always start using the neutral preset. This would be the baseline for any corrections made later. After the first tests I will consider to change the WB, but this time I stick around with neutral until the end of the process.
关于白平衡,我一开始使用中性一点的设置,这将是以后的修改的标准。通过这第一步测试我将考虑改变白平衡设置,但是这次我坚持中性直到最后。
Please see the HDRI setting once again. There I set the render multiplier to 1.0 and just change the Camera Settings to tweak the exposure… Why? I think it makes things simple with just one place to control the exposure of the image. It also resembles real life photography conditions, as the sun and skylight are given and you set the camera to fit.
请再重新看一下HDRI的设置,我设置渲染强度为1.0并且修改了相机的曝光……为什么?我认为这会让事情变得简单,只要有一个地方来控制图像的曝光,同样记住真实的摄影情况。当有太阳和天窗时你只要设置相机来匹配就可以了。
Materials(材质部分)
CONCRETE MATERIAL (混凝土材质)
I created the concrete material out of two base textures blended using Photoshop and you can see the mat buildup below…
我建混凝土,我用了两个基本的纹理,用PS进行了混合并且你可以从下图看到。

I did the same thing with the ceiling and the floor material since all of them are concrete.
对于天花板和地面的材质我做了同样的设置,因为他们都是混凝土的。
WOOD MATERIAL FOR THE TABLE
桌子的木头材质
As you can see in my scene there are lots of tables there, and there is no way all of them will look the same in real life… the wood texture they have. What I did was attaching the table tops into one object and assign material by element modifier to it.
如你所见在场景中有很多桌子,无法让他们都看起来像是现实的样子,他们的木材纹理,我只将他们加在桌子的顶面并且指定材质到元素。
After that I created one multi/sub-object material. Defined 8 different wood textures in it, and there you have it… table tops do not look the same. I did the same thing with the woodwork on the ceiling and walls.
在那之后,我创建了一个多维物体/子对象材质,定义了8个不同的木头纹理在里边,你有了它,将会让你的桌面看起来不一样,我用同样的方法来制作天花板的墙体的材质。


Rendering(渲染部分)
Now its time to render the final image. Below you can see the preset I use for the final rendering.
现在该是渲染最终图像的时候了,下图你将看到我使用的最终渲染图像 的设置。

As my previous explanation on HDRI section. You can see the hsph subdiv are set to only use 60 and global subdiv multiplier 1. This was good enough and I was satisfied with the result of the base render.
我前面部分对于HDRI的说明,你能看到我半球细分的设置只用了60和全局细分倍增为1,这已经很好了并且我对于这个结果很满意。
Below you can see the result of the rendering.
下图就是最终渲染图像。

As you can see, the result is clean enough and I’m very happy about this. 正如你所看到的,图像里非常干净,对于这个结果我非常高兴。 It is not bright enough, but that is perfectly OK… I do not have any blowout at the entrance and will compensate for it all in post production. 虽然它的亮度不够,但这是非常的完美…我没有做任何的曝光在入口,我将在后期处理中加强。 Post production(后期处理) I did a lot of work in this stage, and I’ll do my best to describe it in detail here… so let’s go! 在这一步,我做了许多工作。我将尽我最大的努力来详细的描述一下在这里……现在开始。
First, I want to brighten up the scene a bit. However, I don’t want the floor near the entrance to blowout. I used a brightness and contrast adjustment layer with the floor being masked out of it. Just select the floor using wirecolor and that will help you fill in the mask using black color. And as you can see the result is the floor still like the original rendering. 首先,我想提亮一下场景,尽管如此,我不想地面靠近入口的地方曝掉。我使用明度和对比度的调整层对地面做了一个蒙板。只选择地面将帮助你用黑色填充蒙板。如你以看到的,效果和最初渲染图像是一样的。 9 小时前 上传
下载附件 (268.01 KB)
Next, using the reflection render element… once again I mask out the floor and, enhance the reflection by changing the blending type to linear dodge (add) and give 70 percent of the opacity. This is done by feel, there is no fix law about this.
接下来,使用反射通道渲染元素…再一次我用地面的选区做一个蒙板,加强反射通过调节混合模式为线性减淡(增加)并且给70%的不透明度,只是凭感觉,没有任何依据。
9 小时前 上传
下载附件 (268.01 KB)
Next, using the reflection render element… once again I mask out the floor and, enhance the reflection by changing the blending type to linear dodge (add) and give 70 percent of the opacity. This is done by feel, there is no fix law about this.
接下来,使用反射通道渲染元素…再一次我用地面的选区做一个蒙板,加强反射通过调节混合模式为线性减淡(增加)并且给70%的不透明度,只是凭感觉,没有任何依据。
 9 小时前 上传
下载附件 (299.72 KB)
I wanted to enhance the downlight and also the starbucks logo, for both of them I used VRay Light material, so I could use the VRay Self Illumination render element. I use linear dodge (add) opacity 100 percent.
我想加强射灯和星巴克标志。对于他们俩,我使用了VRay灯光材质,所以我需要渲染VRay自发光通道元素。并且我用线性减淡(增加)不透明度100%进行混合。
9 小时前 上传
下载附件 (299.72 KB)
I wanted to enhance the downlight and also the starbucks logo, for both of them I used VRay Light material, so I could use the VRay Self Illumination render element. I use linear dodge (add) opacity 100 percent.
我想加强射灯和星巴克标志。对于他们俩,我使用了VRay灯光材质,所以我需要渲染VRay自发光通道元素。并且我用线性减淡(增加)不透明度100%进行混合。
 9 小时前 上传
下载附件 (284.24 KB)
Next step is to enhance the indirect light on the floor. I use VRay Light select render element and I only select the VRay Light plane for the indirect light. Now as promise, explanation why in the VRay Light plane is not checked as invisible.
接下来的步骤是加强地面上的间接光照。我使用VRay光来渲染元素并且只选择VRay灯的间接光照。现在兑现承诺,解释为什么用VRay片灯不勾选它的不可见性。
Because then this render element won’t be active. So in order to activate this you must not check invisible. Below is the image of how this render element looks like.
因为后来渲染元素没有被激活,所以为了激活这个,你必须不能勾选不可见。下图就是这个通道元素的渲染图
9 小时前 上传
下载附件 (284.24 KB)
Next step is to enhance the indirect light on the floor. I use VRay Light select render element and I only select the VRay Light plane for the indirect light. Now as promise, explanation why in the VRay Light plane is not checked as invisible.
接下来的步骤是加强地面上的间接光照。我使用VRay光来渲染元素并且只选择VRay灯的间接光照。现在兑现承诺,解释为什么用VRay片灯不勾选它的不可见性。
Because then this render element won’t be active. So in order to activate this you must not check invisible. Below is the image of how this render element looks like.
因为后来渲染元素没有被激活,所以为了激活这个,你必须不能勾选不可见。下图就是这个通道元素的渲染图
 9 小时前 上传
下载附件 (199.24 KB)
Here I use linear dodge (add) and 76 percent of opacity. And the result is below…
这里,我使用线性减淡(增加)和76%的不透明度,如下图…
9 小时前 上传
下载附件 (199.24 KB)
Here I use linear dodge (add) and 76 percent of opacity. And the result is below…
这里,我使用线性减淡(增加)和76%的不透明度,如下图…
 9 小时前 上传
下载附件 (306.87 KB)
I continue to enhance the VRay ies for the downlight. Once again I used VRay Light select and only selected the VRay ies objects (all the ies). I use linear dodge (add) and 59 percent opacity. See the table near camera with croissant on it (makes me feel hungry now) actually the result is not good on that spot, the ies effect got over burned, so I decided to reduce it there by using local masking to reduce the strength of the light on the part only.
我继续增强VRay光域网射灯的亮度,我再一次使用VRay光选择并且只选择了VRay光域网物体(所有的光域网文件),我作用线性减淡(增加)和59%的不透明度,看离相机比较近有很多羊角面包在上面的桌子(现在我开始觉得有点饿了)实际上这个灯光的渲染结果不是很好,这个光域网灯有点过了,所以我决定降低它用局部遮罩来降低灯光照在它上面的强度。
9 小时前 上传
下载附件 (306.87 KB)
I continue to enhance the VRay ies for the downlight. Once again I used VRay Light select and only selected the VRay ies objects (all the ies). I use linear dodge (add) and 59 percent opacity. See the table near camera with croissant on it (makes me feel hungry now) actually the result is not good on that spot, the ies effect got over burned, so I decided to reduce it there by using local masking to reduce the strength of the light on the part only.
我继续增强VRay光域网射灯的亮度,我再一次使用VRay光选择并且只选择了VRay光域网物体(所有的光域网文件),我作用线性减淡(增加)和59%的不透明度,看离相机比较近有很多羊角面包在上面的桌子(现在我开始觉得有点饿了)实际上这个灯光的渲染结果不是很好,这个光域网灯有点过了,所以我决定降低它用局部遮罩来降低灯光照在它上面的强度。
 9 小时前 上传
下载附件 (308.95 KB)
Next was to enhance the ambience from the ies light on the sofa. Once again I used a VRay Light select render element using VRay ies and this time I masked it black and brushed in white back where needed. I brush the sofa area only to enhance the yellow ambience. Here I use linear dodge (add) 60 percent opacity.
接下来提亮环境从光域网照在沙发上开始,我又使用了VRay光选择渲染元素使用VRay光域网并且这次我用黑色刷在白色背景上需要刷的地方。我刷在沙发区域,仅在入口加上一些黄色的氛围。这里我使用线性减淡(增加)60%的不透明度。
9 小时前 上传
下载附件 (308.95 KB)
Next was to enhance the ambience from the ies light on the sofa. Once again I used a VRay Light select render element using VRay ies and this time I masked it black and brushed in white back where needed. I brush the sofa area only to enhance the yellow ambience. Here I use linear dodge (add) 60 percent opacity.
接下来提亮环境从光域网照在沙发上开始,我又使用了VRay光选择渲染元素使用VRay光域网并且这次我用黑色刷在白色背景上需要刷的地方。我刷在沙发区域,仅在入口加上一些黄色的氛围。这里我使用线性减淡(增加)60%的不透明度。
 9 小时前 上传
下载附件 (311.79 KB)
Now its time to use magic bullet photolooks. To start, I use a film like curve and I tweak the curve a bit, and as you can see, the result is very contrasty. I always like high contrast in my images, but overdoing it is not good.
现在是该使用魔术子弹的时候了,刚开始,我使用一个调节电影效果经常用到的曲线并且我只修改了一点点,如你所见到的,这个结果对比非常强烈。在我的图里,我总是喜欢强对比,但是过度也不好。
9 小时前 上传
下载附件 (311.79 KB)
Now its time to use magic bullet photolooks. To start, I use a film like curve and I tweak the curve a bit, and as you can see, the result is very contrasty. I always like high contrast in my images, but overdoing it is not good.
现在是该使用魔术子弹的时候了,刚开始,我使用一个调节电影效果经常用到的曲线并且我只修改了一点点,如你所见到的,这个结果对比非常强烈。在我的图里,我总是喜欢强对比,但是过度也不好。
 9 小时前 上传
下载附件 (262.33 KB)
After seeing the result I desaturated it a bit so I use saturation tool and change the amount to 89 percent.
调完了上一步,我降低了一些饱和度,我用饱和度工具,并且将数值修改到89%。
9 小时前 上传
下载附件 (262.33 KB)
After seeing the result I desaturated it a bit so I use saturation tool and change the amount to 89 percent.
调完了上一步,我降低了一些饱和度,我用饱和度工具,并且将数值修改到89%。
 9 小时前 上传
下载附件 (262.53 KB)
Here I change the mood to look more greenish. I use 3-way color corrector to do the color correction. And I tweak the parameter until I got the green look I wanted.
现在我改了一下调子,让它看起来更绿一点。我使用3色来校正颜色,并且调节参数一直到我想要的效果。
9 小时前 上传
下载附件 (262.53 KB)
Here I change the mood to look more greenish. I use 3-way color corrector to do the color correction. And I tweak the parameter until I got the green look I wanted.
现在我改了一下调子,让它看起来更绿一点。我使用3色来校正颜色,并且调节参数一直到我想要的效果。
 9 小时前 上传
下载附件 (278.03 KB)
I also wanted to enhance the brightness on the window / skylight in the ceiling and also on the entrance. I use spot exposure, this does a really good job at it. I used 2 or 3 spot exposure in the places I wanted to enhance.
我也想加强天窗边天光和入口的亮度。我使用了2或者3个点曝光放在我想放置的入口。
9 小时前 上传
下载附件 (278.03 KB)
I also wanted to enhance the brightness on the window / skylight in the ceiling and also on the entrance. I use spot exposure, this does a really good job at it. I used 2 or 3 spot exposure in the places I wanted to enhance.
我也想加强天窗边天光和入口的亮度。我使用了2或者3个点曝光放在我想放置的入口。
 9 小时前 上传
下载附件 (275.02 KB)
At this point the image looked good, but some warmth was needed… as the image seemed to cold to me now. I used the warm/cool tool to make it warmer.
现在图像看起来感觉不错,但是需要一些暖色,现在感觉图像有点偏冷。我用暖/冷工具将它调得暖一些。
9 小时前 上传
下载附件 (275.02 KB)
At this point the image looked good, but some warmth was needed… as the image seemed to cold to me now. I used the warm/cool tool to make it warmer.
现在图像看起来感觉不错,但是需要一些暖色,现在感觉图像有点偏冷。我用暖/冷工具将它调得暖一些。
 9 小时前 上传
下载附件 (267.62 KB)
I still feel we need to do some more color correction. I did a 3-way color corrector once again…
我仍然感觉我需做更多的色彩校正,同样又一遍使用3色来校正色彩。
9 小时前 上传
下载附件 (267.62 KB)
I still feel we need to do some more color correction. I did a 3-way color corrector once again…
我仍然感觉我需做更多的色彩校正,同样又一遍使用3色来校正色彩。
 9 小时前 上传
下载附件 (287.83 KB)
The result is much better than before. I commit the changes and go back to the Photoshop layer. I do some level corrections, tweaking the Red, Green, Blue levels one by one.
现在的结果比之前更好了,我确定调节参数并回到PS图层,我加了一些色阶修正,分别调节了红,蓝,绿三个颜色通道的色阶。
Here the result…
下面就是结果……
9 小时前 上传
下载附件 (287.83 KB)
The result is much better than before. I commit the changes and go back to the Photoshop layer. I do some level corrections, tweaking the Red, Green, Blue levels one by one.
现在的结果比之前更好了,我确定调节参数并回到PS图层,我加了一些色阶修正,分别调节了红,蓝,绿三个颜色通道的色阶。
Here the result…
下面就是结果……
 9 小时前 上传
下载附件 (362.84 KB)
Now lets do the glowing sky part…
现在进入添加天空光晕部分
Back to magic bullet photolooks. I use diffusion first and after that I use star filter.
回到魔术子弹,第一我使用了扩散和星光滤镜。
9 小时前 上传
下载附件 (362.84 KB)
Now lets do the glowing sky part…
现在进入添加天空光晕部分
Back to magic bullet photolooks. I use diffusion first and after that I use star filter.
回到魔术子弹,第一我使用了扩散和星光滤镜。
 9 小时前 上传
下载附件 (246.49 KB)
9 小时前 上传
下载附件 (246.49 KB)
 9 小时前 上传
下载附件 (249.87 KB)
The result is not affecting the windows area only, it affects all the image. We don’t want that foggy lens look all over…
这个结果并不只影响窗口区域,它也影响了整个图像,我不想让镜头看起来像有雾罩着一样。
I use a black mask, brushing white to bring back the effect to the desired places only – glass windows area.
我使用了黑色蒙板,只在窗口区域用白色笔刷进行光晕效果的恢复。
9 小时前 上传
下载附件 (249.87 KB)
The result is not affecting the windows area only, it affects all the image. We don’t want that foggy lens look all over…
这个结果并不只影响窗口区域,它也影响了整个图像,我不想让镜头看起来像有雾罩着一样。
I use a black mask, brushing white to bring back the effect to the desired places only – glass windows area.
我使用了黑色蒙板,只在窗口区域用白色笔刷进行光晕效果的恢复。
 9 小时前 上传
下载附件 (368.31 KB)
Next thing was to set a background on the entrance area. Here I wanted to have a good result just like in real life, so I added a background and controlled the exposure to make it fit the light levels of that area.
接下来的事是在入口处加上一个背景,我想和现实生活中一样有一个好的效果。所以我需要加上一张背景并且控制好曝光使得它整合到画面中。
9 小时前 上传
下载附件 (368.31 KB)
Next thing was to set a background on the entrance area. Here I wanted to have a good result just like in real life, so I added a background and controlled the exposure to make it fit the light levels of that area.
接下来的事是在入口处加上一个背景,我想和现实生活中一样有一个好的效果。所以我需要加上一张背景并且控制好曝光使得它整合到画面中。
 9 小时前 上传
下载附件 (368.9 KB)
The corner of the ceiling still looked too dark for me… I used a hue saturation channel mixer and raised the lightness value, using a mask to affect the specific corner only.
天花板的角落对于我来说看起来还是有点暗,我用色彩饱和度通道混合器和提高亮度值,使用蒙板来只影响特定的角落。
9 小时前 上传
下载附件 (368.9 KB)
The corner of the ceiling still looked too dark for me… I used a hue saturation channel mixer and raised the lightness value, using a mask to affect the specific corner only.
天花板的角落对于我来说看起来还是有点暗,我用色彩饱和度通道混合器和提高亮度值,使用蒙板来只影响特定的角落。
 9 小时前 上传
下载附件 (358.03 KB)
To enhance the image more, I gave it a depth of field effect…
我整体提亮了一下图像,给了一个景深效果。
9 小时前 上传
下载附件 (358.03 KB)
To enhance the image more, I gave it a depth of field effect…
我整体提亮了一下图像,给了一个景深效果。
 9 小时前 上传
下载附件 (352.61 KB)
And the last touch was a vignette effect…
最也加上了一个暗角的效果。
9 小时前 上传
下载附件 (352.61 KB)
And the last touch was a vignette effect…
最也加上了一个暗角的效果。
 9 小时前 上传
下载附件 (358.95 KB)
9 小时前 上传
下载附件 (358.95 KB)
Well, actually there are still some other last touch, but I guess you can pick this up from here and go on pretty good on your own…
好了,实际上还有一些其他地方的修改,我猜你也能从这里学到怎么调节你们自己想要的效果 。


Thank you for reading this making of starbucks designed by Kengo Kuma, and I hope this tutorial can help you in your own work. Always remember, just like my teacher Nelson Liauw always said, in VRay is just setting numbers, the best way to improve is to sharpen your own sense. 谢谢你来阅读这篇由Kengo Kuma设计的星巴克的制作教程,我希望这个教程对帮助到你,一定要记住,如我老师说的,VRay只是设置一些参数,最好的方法是提升自己的审美能力和感觉。 本文转载自:http://www.archivizcn.com 感谢翻译


评论(243)